10 Git commands you must know
If you are a developer, you must have been throught git. Git is what makes us manage all our codes, it is a sort of version control system. Version control means, it allows you to keeps all the versions of your code, if you change a single character / file in your code it's a new version.
Almost every developer manages their code by it.

In this article I'm going to tell you all about how to use Git in simple way. Once you understand Git, you can use it with GitHub, Gitalb, BitBucket or any other Git based version control system. So, let's get started by introduction.
Introduction
Git is an open source software. It is a version control system. There are other version control systems also, most popular of them is SVN. However, git is most widely used Version control system used accross all software industries.
GitHub is build by using Git. There are other version control systems also, which are build by using git, for example - GitLab, BitBucket etc.
Basics
With Git, most of the time you'll find yourself doing git pull, git commit and git push.

These are the most used git commads. We are going to learn all the command which you need to create and manage your project.
1. git clone
git clone does what it's name says. It take a copy of project from any remote git server and clones it in to your local machine. Now, you have an exact copy of what's in the repository on the server.
There are multiple ways to clone a repository but https is most popular. Here is the command to clone a repository using https with git clone.
git clone <https://link-to-repository>
For example, if you want to clone the django repository. We'll goto its repository on GitHub and get link of it's repo.
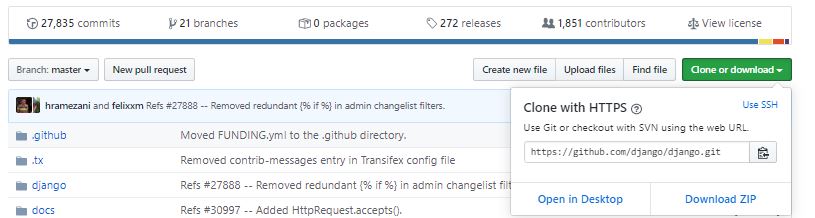
Then our git clone command would be as follows:
git clone https://github.com/django/django.git
2. git branch
git branch allows multiple developers to work on same project in paralell. It basically, takes a copy of code and allows you to work and modify files with project, this new modifications and everything will be on a new branch. Later on branches are merged together to get the final version of code.
creating a new branch
git branch <branch-name>
This will create a new branch locally to push your branch to remote server, you need to push it like this.
git push -u <remote> <branch-name>
View all branches
To view all branches of a repo we use
git branch or git branch --list
Delete a branch
To delete a branch from a repo we use
git branch -d <branch-name>
3. git Checkout
This command is used to switch among branches. You must need to be on a branch in order to work with it. To switch to branch you want to work with, you use git checkout command.
git checkout <name-of-your-branch>
Before you checkout to a branch you must ensure:
- You commit or stash changes to current branch
- You have the brach on your local system, in which you want to checkout
You can also create a branch and switch to it. There is a shortcut command for it:
git checkout -b <name-of-branch>
4. git status
Git status gives completed information of your current branch.
git status
Here is what is brings:
- Current branch status with remote branch - i.e wheather it is updated with remote branch or not.
- If there are changes in local files that are unstaged or untracked
- Which files are newly created or deleted
- If there is anything to commit, push or pull
This is very useful and one of the most used commands.
5. git add
All the modification, like creation of new file, deletion of file, changes in existing file, stays on local system and dont get automatically included in commits. We need to explicitly add them. To add them we need git add command.
To add a single file.
git add <file-name>
To add all files.
git add -A
After, we add the files for tracking, we still need to commit to make changes to repository.
6. git commit
Once we are done with something or say we want to create a kind of checkpoint while developement, to which we might to return back later. We commit. This saves all the changes to repository and creates a commit point.
To commit we need to give a messagen while commiting. This message is helpful for us to track code later on. We mention what we changed / added in this commit. Like added a new line, added a new link, changed color of nav bar etc.
git commit -m "commit message"
Git commit saves all changes to local repo, they dont goto remote server automatically. We still need to push to do so. When we push only the local changes, which are commited are sent to server.
7. git push
Once you are done with changes on local system and commited to local repository. It's time to send it all to server.
gut push is used to send all commited changes to server.
git push <remote> <branch-name>
But wait a minute. If you have created a new branch, it probably on your local sytem till now. You need to push at as well in this case.
There are 2 ways of doing it. One is this.
git push --set-upstream <remote> <name-of-your-branch>
Second is this.
git push -u origin <branch_name>
Note that: git push will only send the commited changes to server.
8. git pull
This command is used to get all the changes from server to local system. If you have done some changes on your local file, someone else has also done some changes in same file on same line, then when you'll get git pull, it will raise a merge conflict. You'll have to resolve this merge conflict manually by yourself, so that git knows what to keep and what delete or which line should come first and which line should come after.
git pull <remote>
9. Git revert
Ocasionally you might want to revert any specifc commit / changes you made. In that case we use git revert.
Before we do git revert, we need to get the hash of the commit we want to revert. We can get it by
git log -- oneline
Now, we want specify the commit we want to revert along with that you also need to specify a message which you want to keep for why you reverted.
git revert hy92345 -m "Your message"
Git keeps history of reverts as well.
After revert you need to push, becuase all the changes are no local only, until you push.
10. git merge
After your done with developement in your branch, its time to merge your brach with master branch. We do it via git merge.
But before you merge, make sure your branch is updated with the latest one. Here is step by step guide to merge:
First switch to the brach in which you want to merge. e.g. you want to merge my-dev branch to master branch, you will switch to master branch.
git checkout master
Now, fetch lastest from master branch to your local my-dev branch
git fetch
Now you are ready to merge.
git merge my-dev
These are the most common git commands i come accross during developement. I hope you enjoy reading it and it will be helpful to you.